Backpacking Tips for Beginners
Backpacking Tips for Beginners (From REI)
출처는 미국의 등산용품 전문점 REI 입니다.
읽으시면서 보시게되는 초록색 문자들을 클릭하시면 REI 홈페이지의 관련링크로 이동합니다.
1. Pick a Partner - 파트너를 정하세요.
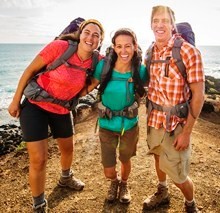
Team up with an experienced friend.
Knowledgeable company is good for peace of mind, and a shared backpacking experience is usually more fun than going solo. A been-there/done-that companion(s) can accelerate your learning curve by sharing wisdom gained in the field.
Join a group.
Group trips (4-6 people, typically) are memory-makers. Most backcountry areas limit groups to 12 (to minimize impact to the land).
충분한 경험을 가진 친구와 팀을 이루어 함께 가십시오.
처음부터 솔로로 나서는 것보다 경험을 공유하고 백패킹에 익숙해지는 시간이 단축됩니다.
그룹에 가입하세요.
일반적으로 4-6명까지의 그룹 여행은 아주 좋은 추억이 됩니다.
대부분의 오지(backcountry)는 토지에 미치는 영향을 최소화하기 위해 그룹을 12명 이하로 제한합니다.
(미국의 대부분의 국립공원은 12명 이상 단체 캠핑을 허락하지 않습니다. 입장 퍼밋 자체를 발급하지 않습니다.)
2. Pick a Destination - 목적지를 택하세요.
Get a guidebook.
Some authors rate trips for scenic quality—very helpful for picking a prime trail. Their 5-star locales usually attract crowds, so don’t expect solitude unless you visit midweek.
Websites, magazines.
Hiking websites abound and can be good resources, though info reliability can vary. Books and magazines are solid sources, and some national parks and forests maintain online trail-condition reports, too.
Ask well-traveled friends.
They can point you to destinations that match your tastes and abilities. REI staffers are also a good resource to tap.
가이드책자를 구하세요.
몇몇 저자들은 좋은 풍경을 가진 트레일을 높이 평가합니다.
그들이 소위 '5성급'이라는 곳은 보통 많은 사람들을 불러모으게 되므로
주중에 방문하지 않는다면 '고독'을 기대하지 마십시오.
웹사이트와 잡지
하이킹 웹사이트는 신뢰성이 완벽하진 않지만 풍부하며 좋은 자료가 될 수 있습니다.
책과 잡지는 보다 안정적인 자료입니다. 몇몇 국립공원과 산림은 온라인상으로 트레일 상태를 알려줍니다.
경험많은 친구에게 물어보세요.
경험많은 친구들은 당신이 능력에 맞는, 즐길만한 목적지를 알려줄 수 있습니다.
3. How Long? How Far? - 얼마나 길게? 얼마나 멀리?
Time and distance.
A 1-night trip makes sense for beginners. Keep the roundtrip distance to 10 miles or less. It is reassuring to know that civilization is not too far out of reach.
Base camp trips.
Got 2 nights? Consider this: Set up camp on Night 1, use Day 2 to relax or take a day hike to somewhere nice, then return to your base camp that night. This way you’ll tote a full backpack on just 2 days.
시간과 거리
1박의 여행은 입문자들에게는 의미가 있습니다. 왕복거리는 10마일(16km)로 제한하세요.
문명으로부터 너무 멀리 떨어지지 않으므로 안심할 수 있습니다.
베이스 캠프 여행
2박인가요? 그렇다면 첫날밤은 캠프를 설치하고, 두번째 날은 편히 쉬면서 근처 어딘가 좋은 곳으로 하이킹하세요.
그런 다음 밤에 베이스 캠프로 돌아오세요. 이 방법은 2일 동안에 풀 백패킹을 나눌 수 있는 방법입니다.
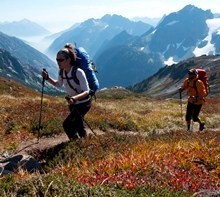
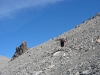
4. Be Ready Physically - 체력을 단련하세요.
Prep hikes.
Prior to your Big Trip, take some training hikes. You need to be in reasonably good condition to attempt a backpacking trip. (Confer with a doc if you have doubts.) Choose hikes with elevation changes that challenge you.
Test-carry a full backpack.
For training, load up a multinight backpack with a tent, sleeping bag and pad plus your 10 Essentials (see below) and tote it on a day hike. It’s a good reality check before your first overnighter.
'큰 여행(장거리 백패킹)'을 하기 전에 하이킹 훈련이 필요합니다.
백패킹을 시도하려면 좋은 컨디션이 필요합니다. 그런 다음 당신이 도전할 고도를 선택하세요.
풀 배낭으로 테스트하세요.
사전훈련을 위해서는 텐트와 침낭, 매트리스에 10가지의 필수장비를
패킹한 '박 배낭'을 하루동안 짊어메보세요.
이 방법은 당신의 첫번째 백패킹 야영을 위해 좋은 사전 점검입니다.
5. Choose Your Gear - 장비 선택
The 10 Essentials: It’s a time-tested assortment of wilderness travel gear that a) ensures you have the basics for safety and comfort and b) equips you to handle emergencies. You may never refer to your compass or use firestarter—2 of the Essentials—but it’s good to carry them, just in case.
Consult a checklist. REI’s Backpacking Checklist includes more items than you’ll ever carry on a single trip, but we made it that way so you don't forget anything important.
Not really roughing it. Many comforts of home also come in impressively lightweight backpacking forms: stoves, cushy sleeping pads, camp pillows.
Think light. It's easy to over-pack. Yes, bring a camera, toilet paper, headlamp and sunscreen. But maybe skip the lantern, the paperback and that third water bottle (bring a water filter instead and resupply as you go.) Aim for a pack weight that’s manageable. Say, around 30 pounds.
Borrow or rent. Try out big-ticket items (bags, tents) before making a purchase so you better understand your preferences. REI stores rent selected camping gear; check your local store for availability.
10가지 필수장비는 비상 사태에 안전하고 편안하게 대처할 수 있도록 야생에서 검증된 장비세트입니다.
2가지 필수품인 나침반과 점화장치의 도움을 받지 않더라도 그것을 가져가는 것이 좋습니다.
(잘알려진 길이나 비교적 짧은 거리라면 필수적이진 않지만 겨울철에는 가져가는 것이 좋습니다.)
체크리스트를 점검하세요.
REI의 백패킹 체크리스트는 단일 여행에서 가져가야 될 장비보다 더 많은 것을 포함하고 있지만,
당신이 중요한 것을 빠뜨리지 않도록 도와줍니다.
너무 불편하게 하지 마세요.
집에서 사용하는 많은 편리한 장비들이 백패킹을 위한 가벼운 제품으로 만들어져있습니다.
(집에서 사용하는 무겁고 편리한 제품 대신 가벼운 장비가 있다는 의미가 강함. 즉 부루스타, 솜이불 대신...^^)
경량을 염두에 두세요.
무거운 배낭을 꾸리기란 쉬운 일입니다. 카메라와 화장지, 헤드랜턴, 그리고 선크림 등등..
그러나 랜턴과 종이책, 정수기로 대체할 수 있는 많은 물은 제외해도 될 것입니다.
배낭 무게는 30파운드(약 13kg) 이하를 목표로 하세요.
6. How to Carry It - 어떻게 메고 갈 것인가?
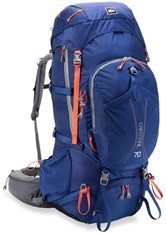
A backpack is designed to carry most of the load on your hips while your shoulders carry less. Get more details on how to choose a backpack.
- Capacity. The number in pack names = the pack’s volume in liters. A common size for multinight trips (2-4 nights) is 60-70+ liters. For longer trips, choose 75 and higher.
- Size: Backpacks are sized according to torso length, not a person’s height. Torso length is determined by measuring the distance between the top of your hips to your C7 vertebrae—that bony protrusion near the top of your neck.
- Loading and adjusting a pack. Keep heavy gear close to your back and near your shoulders. See our pack-loading and pack-adjusting tips for details.
- 백패킹용 배낭은 어깨보다 엉덩이에 더 많은 하중을 받도록 디자인되어 있습니다.
- 용량: 배낭 이름의 숫자는 리터 단위의 용량을 의미합니다. 2-4박인 경우 사이즈는 60-70리터, 그 이상이라면 75리터 이상입니다.
- 사이즈: 배낭의 사이즈는 키가 아니라 토르소의 길이에 따릅니다.
7. What to Wear - 무엇을 입어야 하나?
Base layer. Sweaty cotton takes forever to dry, so choose a “technical” fabric: moisture-wicking polyester or wool. Wool? Yep, lightweight wool wears comfortably in warm weather on the trail, and it retains few odors. Underwear, men’s or women’s, made of tech fabrics is also a smart choice.
Pants or shorts. “Convertible” pants are popular. Their lower-leg portions can zip off if you want more air and sun.
Footwear. Full- or mid-cut boots are traditional backpacking choices, though some folks prefer light hikers or even trail runners. Tennis shoes and urban/athletic footwear are too flexible for roots and rocks on trails. Sandals for lounging in camp are a nice luxury if you don’t mind toting the weight.
Socks. Avoid cotton. Wearing it on the trail is asking for trouble (as in blisters). Choose wool or synthetic socks in a weight or thickness compatible with your footwear.
Head cover. Brimmed hats, caps, Buffs, bandanas—it’s smart to shield your scalp from all-day sun exposure. Bring ample sunscreen for exposed skin.
Outerwear. Even if dry weather is forecast, a rain jacket keeps bugs off your arms and torso while in camp. An insulation layer (jacket or vest) wards off chills early or late in the day.
베이스 레이어: 땀에 젖은 면 의류는 건조하는데 너무 많은 시간이 걸리므로 속건성의 폴리에스터나 울 소재의 기능성 원단을 선택하세요. 가벼운 울 소재의 읠는 편안하며 따뜻합니다. 속옷 역시 기능성 소재를 선택하세요.
바지와 반바지: 컨버터블(반바지로 분리할 수 있는) 팬츠가 좋습니다. 환경에 따라 다리 하단을 분리할 수 있습니다.
신발: 발목 이상, 혹은 미드컷이 전통적인 백패킹 신발인데 가벼운 하이커나 트레일 러너들도 좋아합니다.
테니스 신발과 도시에서 신는 운동화 역시 돌과 나무뿌리가 많은 트레일에서는 유연하게 선택할 수 있습니다.
무게에 크게 개의치않는다면 야영지에서 편안하게 신을 수 있는 샌달도 괜찮습니다.
(최근 장기 트레일을 위한 경량 백패커들은 발목이 없는 트레일 러닝화에 가벼운 스패츠를 많이 착용합니다.)
양말: 면 소재를 피하십시오. 물집이 잡히기 쉽습니다. 신발에 적합한 무게와 두께를 지닌 울이나 합성섬유 소재가 유리합니다.
모자: 챙모자나 일반모자, 버프, 반다나 스카프 등은 하루종일 땡볕에 노출되는 것을 막아주는 좋은 선택입니다.
겉옷: 일기예보에서 건조한 날씨라고 해도 레인 자켓은 야영지에서 벌레들로부터 보호해줍니다. 충전재가 들어있는 자켓은 추운 아침 저녁에 필요합니다.
8. What to Eat - 먹는 것
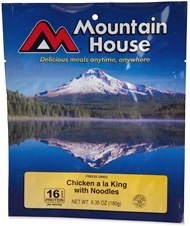
Dinner. For simplicity, choose dehydrated meals that require just a few cups of boiling water and 10 minutes of wait time. Gourmands or those with access to a food dehydrator can make more creative trail meals.
Rest of the day. Some backpackers take time to cook breakfast; others save time with ready-to-eat items. Lunch can be a meal or several snack breaks of trail mix, jerky, dried fruit, chunks of cheese and energy foods (bars, chews and gels).
Coffee. Lightweight coffee press and French press units do, in fact, exist.
Food storage. Never leave food lying around unattended. Carry a food canister or learn how to hang food to protect your edibles (and any aromatic items) from critters. You’ll likely lose it, and the animal may never want to forage in a natural manner again.
저녁: 간편하게 몇컵의 끓는 물로 10분 정도만 기다리면 먹을 수 있는 건조식품이 좋습니다. 대식가라면 식품건조기는 보다 창의적인 트레일 식량을 마련할 수 있습니다.
(외국 백패커들은 실제 식품건조기를 이용하여 과일이나 견과류, 심지어 육류와 생선까지 '탈수'하여 식량으로 사용합니다.)
저녁 외 식사: 몇몇 백패커들은 아침식사 조리하지만 대부분은 바로 먹을 수 있는 음식으로 시간을 아낍니다. 점심은 스넥이나 밀, 트레일 믹스, 육포, 말린 과일, 치즈, 에너지바 등으로 해결합니다.
커피: 가벼운 커피 프레스와 프렌치 프레소 제품이 있긴 합니다.
식량 보관: 음식은 사람없는 곳에 그냥 두지마세요. 음식을 지키는 일이기도 하지만 야생 동물이 인공적인 먹이에 익숙해지는 것도 좋지 않습니다.
9. Backpacking with Kids - 아이와 함께하는 백패킹
Adjust your expectations. You’ll travel slower and over shorter distances, but done right (with compassion and patience) you can cultivate a love for outdoors adventure in your little ones.
Teach respect for the land. Encourage kids to stay on trails and not cut switchbacks. Ask them not to pick flowers, tag rocks or carve their names into tree trunks.
Tips to help you. Read the REI Expert Advice article, Backpacking with Kids.
기대치를 조정하세요.
아이와 함께 간다면 보다 천천히, 보다 짧은 거리를 가야하는데 아이들의 아웃도어 모험을 통해 자녀에 대한 연민과 인내심으로 애정을 고양시킬 수 있습니다.
자연을 존중하는 것을 알려주세요.
등산로를 벗어나지 않고 지름길을 만들지 말라고 말해주세요. 꽃을 꺾지 않고 바위에 낙서하지 않으며, 나무에 이름을 새기지 않도록 하세요.
10. Communication - 통신
Mobile phones. Do not count on getting cell phone reception in wilderness areas. Cell towers can be found near visitor centers at a handful of national parks, but in the backcountry, cell reception is rare.
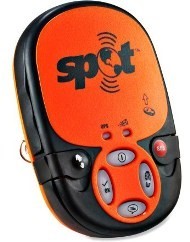
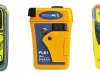
Other options. These include satellite phones (pricey, but your best bet if on-demand access to civilization is a must), satellite messengers (capable of transmitting 1-way or even 2-way text messages), 2-way radios (best for groups spread out over a large area; average range is 2 miles) and personal locator beacons (for sending a distress signal). Portable power sources (such as solar chargers) can generate enough energy to fully charge a smartphone.
휴대전화: 야생에서 휴대전화는 염두에 두지 마세요. 방문객 센터 근처에는 송수신탑이 있지만 오지로 들어가면 없을 수 있습니다.
다른 옵션: 비싸긴 하지만 통신이 꼭 필요하다면 위성전화가 가장 좋습니다. 다른 제품으로는 위성통신 메신저가 있습니다. 일방향, 혹은 양방향으로 텍스트 메시지를 주고받을 수 있는 제품입니다. 단체로 넓게 흩어져서 간다면 무전기가 좋습니다. 적용범위는 약 2마일 이내입니다. 개인위치 전송장치(비콘)도 유용합니다. 태양광 충전기와 같은 휴대용 전원도 스마트폰 등을 충전하기 위해 필요합니다.
11. Before You Go - 떠나기 전에
Practice at home or a campground. Pitch your tent in your backyard. Inflate your sleeping pad. Light your stove. Check out your headlamp. Know how things work in a comfortable place before you’re under pressure in an unfamiliar setting.
Call ahead. Avoid surprises. Contact a ranger office at or near your destination. Ask about road closures, trail conditions, permit requirements, animal activity or any temporary restrictions.
Share your plans with a friend. Leave an itinerary with a friend who will remain in town. If you don’t return by the appointed time, your friend can notify rangers that you may need help.
집이나 야영장에서 연습하십시오.
뒷마당에 텐트를 설치해보세요. 슬리핑 패드도 한번 불어서 충전해보세요. 스토브도 점화해보세요. 헤드랜턴도 점검하세요. 익숙하지 않은 환경에서 압박을 받기 전에 편안한 곳에서 충분히 그 사용법을 알고 있어야 합니다.
사전 연락
당황하는 것을 피하기 위해 목적지 근처나 관리사무소에 미리 연락하세요. 도로가 폐쇄되었는지, 트레일의 상태가 어떤지, 퍼밋이 필요한지, 동물의 활동이나 일시적인 제한이 있는지 알아보세요.
당신의 계획을 친구에게 알리세요.
동네에 남아있는 친구에게 여행일정표를 남기세요. 당신이 정해진 시간에 돌아오지 않으면 그 친구는 레인저에게 도움을 요청해줄 것입니다.
12. Wilderness Ethics - 야생에서의 수칙
"Pack out what you pack in." It’s an old phrase but still valid, along with “Take only pictures, leave only footprints.” In the wilderness, no one cleans up after you. So be relentlessly tidy. Pick up every wrapper, tote out every orange peel. Any item that does not originate in the wilderness, even an apple core, should not be left there. In some backcountry areas, that includes toilet paper. Learn about Leave No Trace principles so wilderness scenery perpetually looks untouched and inviting, just the way you want to see it.
Understand the backcountry is wild and unpredictable, not a theme park. In the wilderness, you’ll find no handrails, no courtesy phones, no attendants, no flush toilets, no water fountains, no snack bars. It’s a potentially dangerous place. That’s part of its appeal—wild lands are a different world. Self-reliance is a vital skill for appreciating them. Be confident that you can adapt to the unexpected.
This ain’t no disco. Realize most people head to the wilderness for peace and serenity—an escape from the noisy urban norm. Have fun; just please self-regulate your noise level.
Ultimately, relax and enjoy. Stay committed to being nice to fellow backpackers, the animals and the land. Breathe deeply, soak in the views and immerse yourself in a whole new world.
가져간 것을 모두 되가져오기.
오렌지 껍질, 사과 속 등 모든 것을 되가져오세요. 사용한 화장지도 되가져오세요.
오지는 테마파크가 아닌 예측불허의 야생지역임을 이해하세요.
오지에서는 안전한 난간이나, 친절한 전화, 종업원, 수세식 화장실, 넘쳐나는 샘물, 스낵바가 없습니다.
그래서 잠재적인 위험이 도사리고 있는 곳입니다. 불확실성에 적용할 수 있어야 합니다.
백패킹은 디스코 춤이 아닙니다. 대부분의 사람들은 도심의 번잡함과 소음으로부터 탈출하여 평화로움과 조용함을 누리기 위해 야생으로 향합니다. 즐기되, 소음을 스스로 조절해야 합니다.
궁극적으로는 릴렉스하며 즐기십시오. 동물과 대지에게 훌륭한 백패커 동료가 되도록 최선을 다하세요.
깊게 숨을 들이켜보세요. 풍경에 푹 빠져보고 새로운 세계 속에서 스스로에게 침잠해보세요.
...................................................................................................................................................................................
언제나 즐산, 안산 하시기를 바랍니다.
- ?
-

길벗님 저도 올해 존뮤어트레일 완주, 그리고 향후 3~4년에 걸쳐 캘리포니아 14ers 완등에 대한 도전을 시작해 보려고 합니다.
자주 여쭙고 도움말씀 많이 듣고 싶습니다. ^^
-
Read More
등선용품 추천 - 032622
이번 3/26/22(토) 15대 마지막 총회에서 선보인 회원분들의 등산 장비들입니다 TheTentLab The Deuce #3 Heavy Duty Backcountry Trowel Anker powerPort Solar KT tape Survival Rescue Blanket Epica cut resistant gloves Zpacks UL groundsheet Poncho Fro... -
Read More
위급시 비상 통신기기 at backcountry
씨에라 깊숙한 산속 뿐 아니라 미국은 동네 뒷산도 휴대전화가 안되는 지역이 대부분이기에 위급 상황이 발생시는 휴대전화가 안되는 지역이 오지(backcountry)로 정의 하기에 부족함이 없습니다. 산행 및 캠핑을 자주 하는 저희 산악회 회원은 개인 혹은 그룹... -
Read MoreNo Image
크렘폰 / Ice Axe 사용 테크닉
경사도가 급격한 산의 등산시 급경사지에서는 스노우 슈즈나 마이크로 스파이크의 유용성이 떨어지고 그보다 스파이크 갯수와 길이가 긴 크렘폰과 Ice Axe가 필요하니 그 사용법을 알아봅니다. Ice Axe는 빙벽을 오르는 곡괭이(?) 스타일과 경사지를 오르는 클... -
Read MoreNo Image
Winnemucca Lake 눈산행 평가
이번 위네머카 호수 눈산행을 통해 경험한 몇가지 사항을 향후 동계 산행시 참고용으로 아래와 같이 정리합니다. 1. 숙영 장비 텐트 : 바람이 거의 불지 않아서 Inner Tent만 쳤는데, 외부 기온 섭씨 영하 7 도 상태에서 텐트 내부 기온이 0도를 유지했습니다.... -
Read More
산행 난이도 시스템 & 등산용어
지난 9월 이스트시에라 백팩킹 공지때 아래의 몇몇 용어들도 사용해 코스를 포함한 백팩킹의 대략적인 정보를 표시했는데 백팩킹 대화중 몇몇분들이 용어들을 생소해 하셨습니다. 특별산행 (백팩킹/ 고산등반/ 암벽등반) 공지에도 가끔 사용되는 코스의 난이도... -
Read More
따듯한 동계 캠핑 팁 소개 입니다
안녕하세요 동계철 캠핑에 텐트 취침시 침낭 안을 보온 할수 있는 방법중 하나를 소개해 봅니다 밑의 사진과 아마존 링크를 넣어 두는데요 지난 9월말 32F 이하의 캠핑시에 사용해 보니 예상보다 침낭 안이 따듯하게 보온이 됩니다 아이폰 사이즈의 Warmer 한... -
Read More

침낭팩 싸이즈 줄여주는 압축팩
이제 겨울이라 슬리핑백을 0F degree까지 커버하는 것으로 하나 샀더니 부피가 여름용 대비 상당해서 이리저리 고민하다 일반 침낭용 압축백 대신에 새로운 압축백을 사서 시험해 보니 결과가 상당히 만족스럽습니다. 혹시 백팩킹시 짐 싸실 때 침낭 싸이즈 때... -
Read MoreNo Image
저렴한 장비 메이커가 출현했슴.
중국 메이커인데 직접 판매를 하는 거 같습니다. 품질이 어떨지는 모르지만, 가성비는 괜찮아 보입니다. https://3fulgear.com/product/qidian/ 이 메이커 제품이 쓸만하다면 Hyperlite/Zpacks 는 긴장 좀 해야할 꺼 같습니다. -
Read More

일사병 (Heat exhaustion)과 열사병 (Heat stroke)의 ...
일사병 (Heat exhaustion)과 열사병 (Heat stroke)의 다른점 일사병 (Heat Exhaustion)이란, Heat exhaustion is a condition whose symptoms may include heavy sweating and a rapid pulse, a result of your body overheating. It's one of three heat-rela... -
Read More
효과 좋은 모기 기피제
TV 뉴스속에서 영상으로 자주 보여지기는 하지만 백팩킹을 하여 하이시에라에 가보면 캘리포니아의 가뭄을 눈으로 직접 확인할 수 있어 걱정이 더 늘어가는게 현실인것 같습니다. Lake 들의 수위가 줄어, 없었던 beach 들이 생기고 분명 지도상에 그려져 있는 ... -
Read MoreNo Image
솔로산행과 고산증
저는 가끔 솔로 산행을 합니다. 이전에는 일년에 많아야 두세번 이스트 시에라나 킹스캐년등 장거리 산행을 솔로로 하였는데 지난해부터 본의아니게 일하는 시간을 많이 줄인 관계로 비교적 자주하게 되었습니다. 그런데, 지난 일요일 혼자나선 솔로 산행에서 ... -
Read MoreNo Image
BEST BACKPACKING GEAR OF 2021 by Allan
백팩킹을 어디서부터 시작해야 할지... 처음부터 잘 아는 사람은 없습니다. 백팩킹 장비를 잘 설명해 놓고 있어서 공유합니다. 제 경험을 비추어 봐도 아주 정확하게 장비들을 엄선한 것으로 판단됩니다. 좋은 참고 자료인 것 같습니다. https://www.adventure... -
Read MoreNo Image
씨에라 지역 도로 상황 실시간 조회 웹캠 URL
제가 타호지역 눈산행 갈때 참고하는 싸이트입니다. 50번 에코 패스와 트윈브리지 도로, 80번 도너 패스, 그리고 타호 진입로 등을 실시간으로 보실 수 있습니다. http://www.newtoreno.com/ca-us50-webcams-echo-summit.htm 이번 주말에 폭설이 예상되니 그리... -
Read MoreNo Image
Backpacking Basics 유용한 정보
안녕하세요 세시간 이상이나 되는 분량이긴 하지만, Backpacking 관련한 유용한 정보가 너무나 가득, 이 분도 Long distance hiking 으로 많이 알려진 backpacker 입니다. 제목은 Basics 이라고 되어 있으나, Backpacking 에 필요한 정보가 모두 있는 것 같습... -
Read MoreNo Image
Top rope anchor 설치법
Diablo 에서 top roping climbing 연습 등을 하실 때, 앵커 설치하는 영상 몇가지를 소개합니다. 1. 볼트 2개로 anchor 설치하는 방법 2. 나무를 이용한 Top Rope 설치법
이런 수고를 해주시는 분들이 있어야 초보자들도 감히 용기를 낼 수 있습니다. 감사합니다.